Wednesday, November 19, 2014

Kitchen Remodel Day 16 - Elapsed Day 29

Surprise!!!

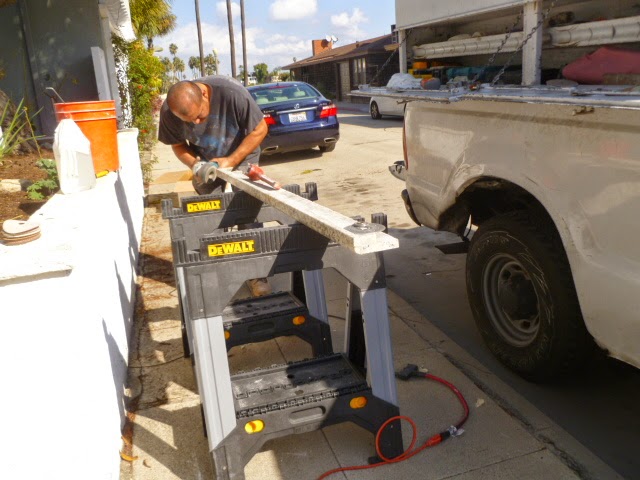
It's Replace Sidewalks day!

Street blocked off, no parking, cement saws, jackhammer, dump truck, concrete truck, grand central station.

Only pieces of the sidewalk were replaced.  But ours was one of them.


Bird HATED it.

But notice how blue the sky is?

A beautiful 80 degree day.  With every window closed and every fan on.

Watch that first step, it's a lulu.  (the view from our front door)

But the good news is, Saul and Saul Jr. showed up.  Before lunch time!

Saul Jr. was going to finish the electrical, including the 220 v receptacle in the living room for a future heater.


Which meant we had to move the white hutch full of microwave and dishes, etc., to get to the wall.

Saul Jr. was under the house when the jackhammer right outside the sunroom started.  I was in the big chair eating lunch, and jumped about a foot.  I felt REALLY bad for Junior.  the whole house shook.


 Saul had to leave for awhile, but he did come back and finished up the work under the sink.

He installed a new P-trap, the garbage disposal with new button switch, found room for the hot water dispenser with cold filtered water, found room for the filter, and installed the soap dispenser and dishwasher!


However, the electrical didn't get finished.

The little wire is for the lights under the cabinet.

But the hutch made it back against the wall.

The wallpaper border arrived.  We decided that the yellow kitchen walls will be fine with it.  So we don't have to paint the entire kitchen, just where the spackle is.  If we had wall texture.

That will be when we get back, methinks.

Now with the dining room devoid of appliances, we can move Bird back to her "home" until Saturday morning.

Monday, November 17, 2014

Kitchen Remodel Day 15 - Elapsed Day 27 - Floor Day

9:00 We were expecting the floor guys about 9.

10:00 Floor guys showed up.

Nope, they can't do it.  Need to lay an underfloor.  The wood planks will show through, and it will nullify the warranty.  1/8" is their smallest underfloor.  Which would be fine at the dining room, but pretty high at the bathroom.  Nope, don't want that.  Just float it.  But the boards will move and the concrete will crack and you'll have a bump in the floor.  We'll take that chance.

10:15 OK.  They got to work. 

After moving out the stove and dishwasher out of the kitchen, first task was to scrape up the little bit of old floor that I hadn't done a couple of weeks ago.

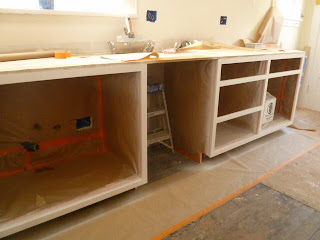
In the picture above you can see the angle of the end cabinet.  The picture was taken from the back door.

Next they started with a very thin layer of concrete stuff, and a huge fan to dry it.


They used a skill saw to saw under the old cabinets to make room to tuck the linoleum under.

After the first coat dried, another thicker coat was put on.


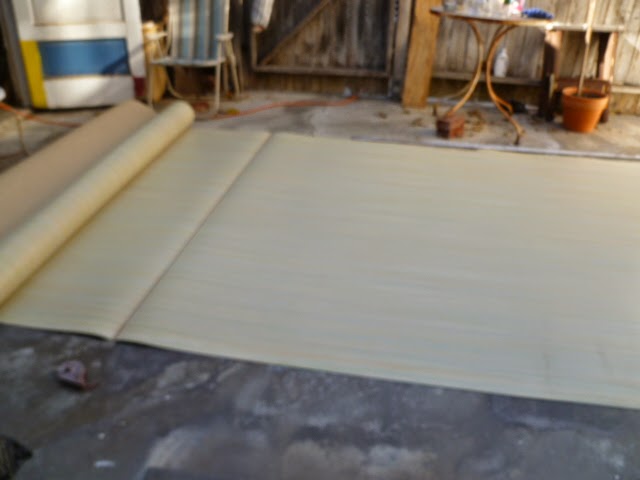
They laid the linoleum out in the back yard, and it just looks like a nondescript floor.

But it looks yellow to me.

It took awhile to explain to them where I wanted the seams.  I got out my picture.

12:00  Lunch Time


1:00 Time to scrape the floor again, put glue down, put linoleum down, then roll this heavy roller over it to keep it in place.

The rest went pretty fast.  Jerry was trying to get them to put linoleum all the way under the cabinets, but they wouldn't do it.

2:20  One guy was staging appliances while the other worked on the last seam.  There are two seams going sideways. 

They had to overlap and cut through both layers.

3:00  And here's the finished product. 

Notice we took advantage of the muscles and dollies to move the refrigerator in.

Now the dishwasher is in the dining room, but it has wheels.

The stripes don't even show up!


 But see, it really is striped. 

And, from the dining room you can see every board, which run the opposite way of the stripe.  Should've done the underlay.

Jury's still out on liking the color, and it seems hard to keep clean.  We'll see.

They have to come back tomorrow with the finishing strips, and I asked for quarter round.  That will be extra, but it really needs it.

Oh, and one other side note.

Saul connected the sink and garbage disposal to the drain, but not the other side.  I found soap and bird veggies in the bottom of the cabinet this morning.

Somehow our garbage disposal just passes garbage right along unless you turn it on.  So Jerry found an extension cord and we ran the garbage disposal.  And he plugged up the other side of the drain.

Happy Remodeling!

4 days til we leave for Portland!


Saturday, November 15, 2014

Kitchen Remodel Day 14 - Elapsed Day 25 - GRANITE DAY!!!

8:04  Granite guys arrive!  Where to park?  Let's wake up the neighbors and ask them to move their car!

Let's clean up the counter real quick!  All our stuff, all Saul's stuff.  Not many places to stuff things anymore.

It took 2 guys to carry the sink in.

Jerry called Saul;  he was on his way.

9:00  Starting to measure and mark the cut  for the sink.
 
Inspector Bird was on the job to make sure they did it right.

He started to use a saw, but the other guy wouldn't let him until he quickly closed the back door, closed all the windows, and got a shop vac to suck up the sawdust as it was created.

After the hole was sawed, they screwed 2x4's in on all sides to support the sink. 

9:30  Finally, the sink was into it place. 

Notice the divider between the sink basins only comes about halfway up.  Hope I like that.


Saul arrived, and started compiling his shopping list so he could make one list of all the plumbing parts he needed.

The plan was to install the sink today so we have water and a sink!

Time to pull out all the boxes and lay out all the pieces and see how everything fits.

Ooops!  First problem is that the faucet takes up the width of 2 of our 3 sink holes! 

We need all 3 holes! 

The faucet handle is so wide to the right that it overlaps the next hole. 

Neither the hot water dispenser or the soap dispenser would fit!

So here's Saul and Jerry trying to figure out how everything works. 
Saul left for the store, and to go help another customer right over there.  

If they finish before he gets back, just pay them what you owe.
It should only take 2 or 3 hours.

I went outside, wanted to see what was going on out there.

The smaller pieces of granite were unloaded and set on the planter. 

This is a piece of back splash, and this guy is handling it by himself!


9:40  The first piece of granite is brought in. 

This is the corner piece that goes around the corner to the stove, and the little pieces going halfway around the sink.


Bring it in and plop it down!


They brought both pieces in, then they lifted it and while one guy held it up, the other guy loaded gobs of glue underneath. 


Then they just ease it down into place. 

Now it wiggles a little bit. 

It squishes on top of the glue. 

They say the glue dries in 24 hours. 


Here they are repeating the process on the other side. 

Glue it up!


Ease it down.

The next process is to glue the seam.

They keep part one of their epoxy in a plastic pop bottle cut in half like Eva's bug catcher.

They lay out a gob on a piece of cardboard and then color match it to the granite. 

They have a little box with their colors that look just like my little acrylic paints. 

He mixed green, black and yellow ocher.  I would guess 6-2-1.

He mixed a little bit, then added another couple drops.

Mix it up again. 


He put a few drops of color on the very edge of the palate so he could just dab little bits of color and mix it up.


Here is the finished product.


Notice that the two pieces of granite don't line up exactly. 

He stuffed the glue in between with a putty knife.


then squished it together.

The glue matches pretty well!


To level the two sides, he put a piece of marble on top of the granite and used the C-clamp to hold it in place.

And to hold the back piece down, he just stabbed a poker into the wall!

Also, here you can see the box of acrylic paints in the picture below.
  
Now they had to repeat the process for the pass through. 

They cut the inset for the wall on site. 

They took the plywood outside, and cut a 4" notch out of the granite with something that looked like a skill saw but with a diamond blade.  Boy was it loud!

Then they brought it in and it almost fit perfectly.  Just mucked up some of my great paint job.  You can see the mess below.

They installed the back splash; the last piece cut to length.

11:45  Hmm  8:00 + 3 hours = 11:00?

Saul made it back before the granite guys left.

There wasn't enough granite to make the window sill as wide as we wanted, so Saul had to trim a little bit off the wood edge.

The granite guys actually fabricated the  piece for the window sill on site.

This was the step that took a long time.

Well, they also spent a lot of time leveling the sink up to the granite so it was a tight fit.

They impressed Jerry with their $$$ collection of diamond sanding disks. 

They cut the hole for the garbage disposal button. 

Another very loud operation that Bird had to inspect.

Bird is anxious for the glue to dry so she can try out the granite.  


So far her only comment is "too hard".

12:45  Almost done.  OK, it looks done to me. 

 Jerry checked everything twice with his level. 

Everything is right on.

The guys polished the seams to Saul's satisfaction.
Once the guys left, Saul installed the faucet.

Since Jerry wants the linoleum all the way under the dishwasher, Saul is going to wait to install the dishwasher and the water filter and the soap dispenser until next time he comes.

He put the garbage disposal in the left side for now.

 I think I want it in the right side, don't I?

The faucet is installed backwards so the handle doesn't cover up the other holes.

Saul put tape over the other holes to keep splashed water out. 

Don't want it to mess up his cabinet!

1:30  The end result. 

The granite is really shiny, and reflects a lot of light. 

The stove isn't in position yet.

I opted to show the granite close up rather than the edging and the angle back to the wall closest to the camera.

Floor guys come Monday.

Saul says he'll be back Wednesday.

I'm exhausted.


T

Thursday, November 13, 2014

Kitchen Remodel Day 13 - Elapsed Day 23


This is just to set the tone.  A snapshot of the ambiance around our home.  Piles of parts everywhere.


Somehow 9 turned into 11:30, but Saul showed up today and patched the two holes behind the refrigerator.  


Then he painted the cabinets.  I can't seem to get a good picture of "shine".  The sun went behind the clouds.

But take my word for it, they are VERY shiny!

He was out of here by 1:30.

See you on Saturday!


3:00 News Flash. 
The floor guys will NOT be coming tomorrow.

So now, if the granite is really ready, they could install it tomorrow and do the sink on Saturday, and floor on Monday!  Left word with Saul, but haven't heard back.


Meanwhile, I got the brown wall painted.


Wednesday, November 12, 2014

Kitchen Remodel Day 12 - Elapsed Day 22


Tuesday came and went, but Wednesday, just as I was getting ready to go to Art Class with Jo, Saul showed up!

Good news!  Granite is ready for installation Saturday!

He primered the base cabinets.  He used a face mask and air compressor and a big fan. 
As the room filled with white haze, I grabbed the bird and took my dinner outside to eat.


When I got home from class, the "brown wall" had been textured.  Now I can paint!


See you tomorrow between 8:30 and 9!

Saturday, November 8, 2014

Kitchen Remodel Day 11 - Elapsed Day 18

Ha! Ha!  Fooled ya!

This is my finished "seasons" painting from one of Jo's "pattern packets".  It was originally done on heart shaped coasters, but I made it into one item.

From here it's hard to see the detail!  Maybe it should be bigger!!!  Can you find the bunny?

On to the next one!!!


Oh, just to keep with the theme, the floor install is scheduled for next Friday. It is called "Water Colour" Marmoleum (Lineoleum).


Seems I posted this too soon!  Saul and Saul Jr.  showed up about 4 and shortened the fan so that the cabinets can be taller.


OK, I'll see you Tuesday.